PLANNING
Before I launched into creating a refined, fully colour analogue storyboard, I first roughly planned out my shots using the rule of thirds grid in order to edit any part freely and easily before colouring it on paper.
Based on the story of Tai being quarantined and turning insane, this was the rough storyboard I came up with.
There are notes only under a few panels to mark any detail I was afraid I would forget later on.
ROUGH ANIMATIC
To see how effective the storyboard was before it was too late, I made a rough animatic of my sketches and timing each shot to see if it would make sense if it were to fit the 40-second mark.
It seems to go very quick, and will probably be hard to follow the narrative from how fast it is. I’ll have to edit the storyboard down by removing some frames while making sure that the narrative is still clear. The use of sound might also help with this as well.
REFINING THE STORYBOARD
I drew out all the boxes for the storyboard on my 26x38cm sketchbook and drew a rule of thirds grid on all of them with yellow coloured pencil in order to rub them out later.
I chose coloured pencil as they are easier to control and less messy than other traditional mediums, and the clean white background is key to the story. I also use ink for line art and black backgrounds to create clean lines and sharp contrasts.
Ink pens were also useful for when I want to create texture and increase the intensity of a scene in the animatic.
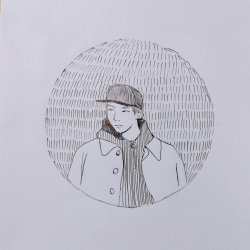
THE REFINED STORYBOARD
All the frames were photographed and edited on Adobe Photoshop to try and maintain the detail and colour of the coloured pencil as well as keep the white background clean.
Making the storyboard may have taken a long time, but overall I think the narrative structure is clear even without additional notes. Hopefully, I can edit it all together and maintain that clear narrative structure in the animatic.